[vc_row css=”.vc_custom_1672835693187{margin-bottom: 100px !important;}”][vc_column][vc_column_text css=”.vc_custom_1710160855243{margin-bottom: 20px !important;}”]
What is .ipa file and how to install .ipa file?
An .ipa file is a mobile application package file used to package iOS apps. It contains the app and its associated files, including any resources and assets needed to run the app. If you are a developer looking to publish your iOS app or if you need to create an .ipa file for testing purposes, you might be wondering how to generate one. In this article, we will provide a step-by-step guide for generating an .ipa file in iOS. By following these steps, you can easily create an .ipa file for your app.
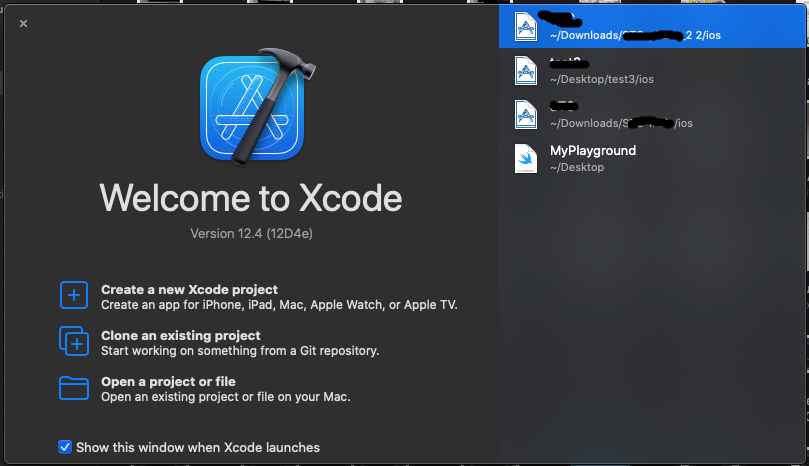
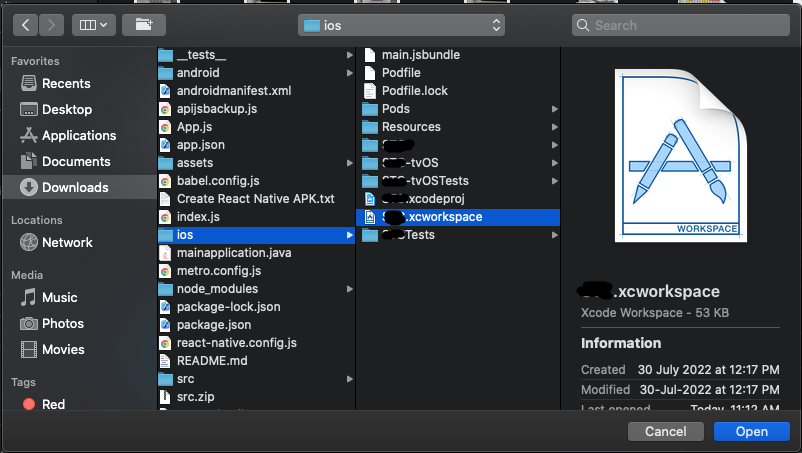
- Open project folder in Xcode. Go to file: PROJECT_NAME_FOLDER>ios>PROJECT_NAME.xcworkspace Open in Xcode.
- Select PROJECT_NAME in TARGETS
- Select General and type in Your Project version, build number, and Project name.
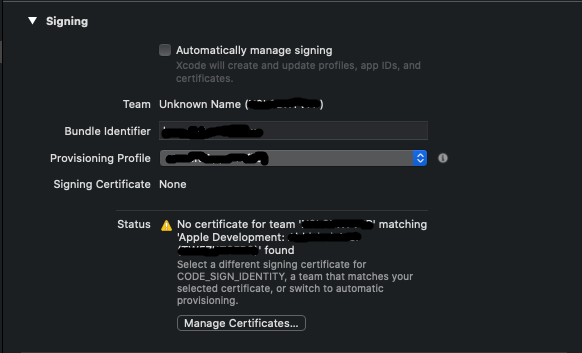
- Go to the properties screen and select Signing & Capabilities: Uncheck the automatically manage signing if it’s checked.
- Select your Bundle Identifier and Provisioning Profile.
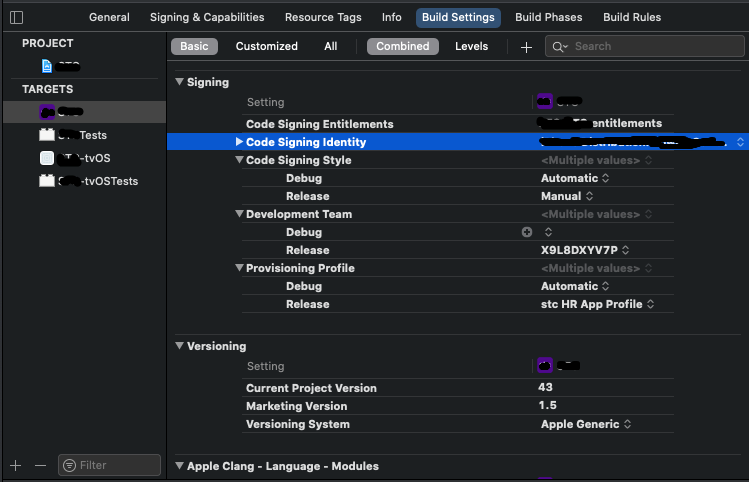
- In case if you see this error go to Build Settings>Signing>Code Signing Identity
- Then select your project Signing Identity.
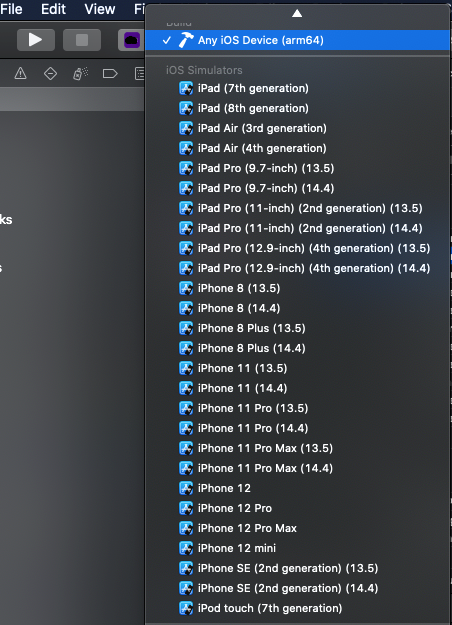
- Select Any iOS Device in the toolbar
- Go to the taskbar click on Product and select Archive, archiving process takes a few minutes.
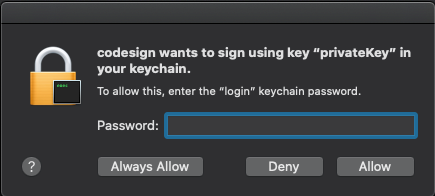
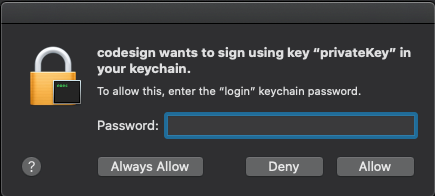
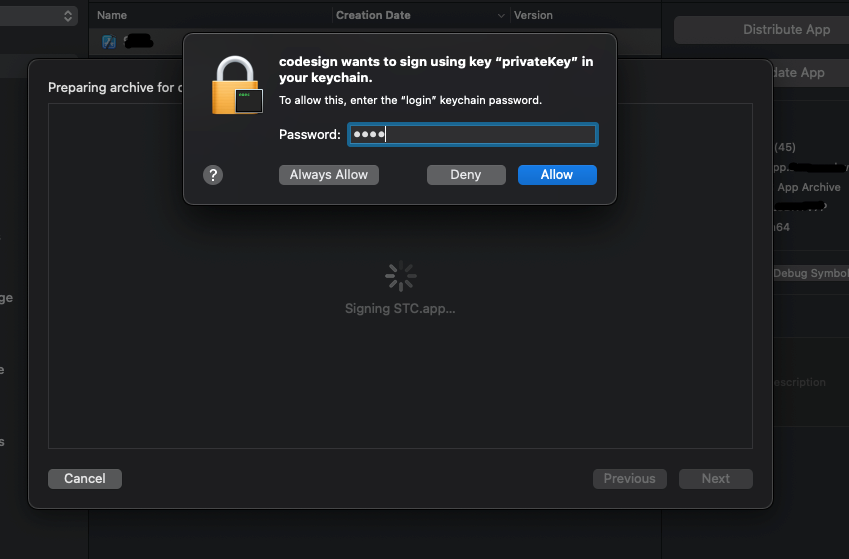
- During the Archiving process, XCode will ask you for a login keychain password, enter the password and click allow.
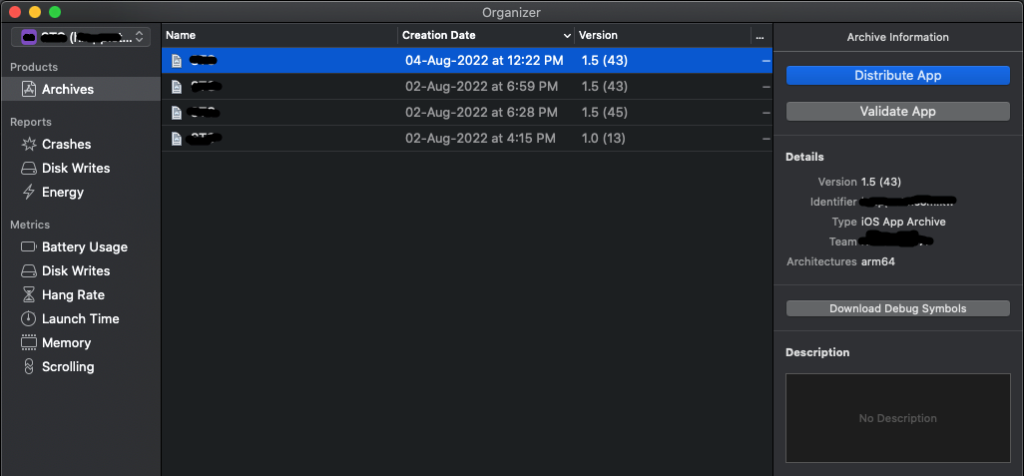
- An Organizer window will pop up, Click on Distribute app under Archive Information.
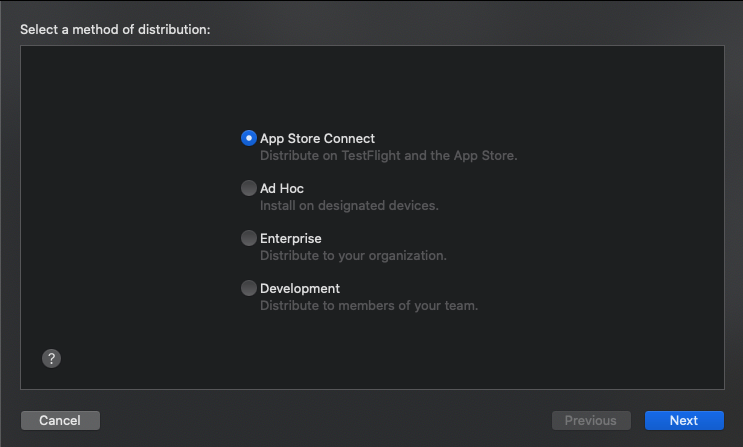
- Select App Store Connect and click next.
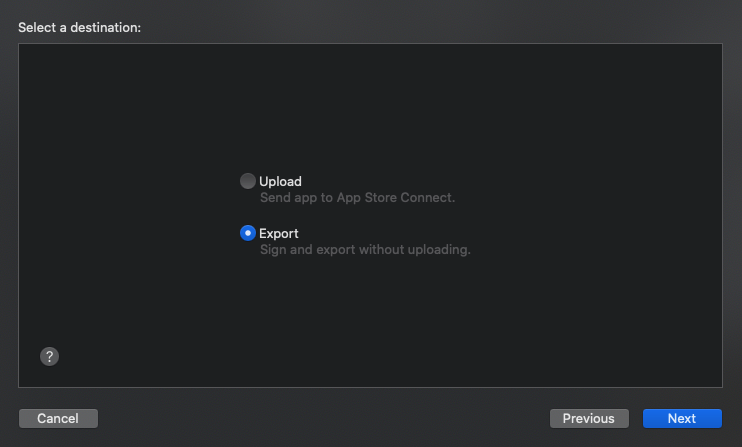
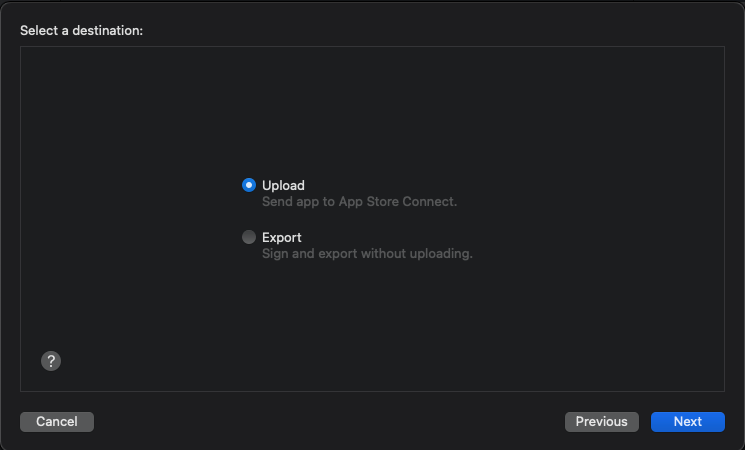
- You’ll get two options:
- Select Upload if you want to send app directly to the app store
- Select Export to generate your .Ipa file
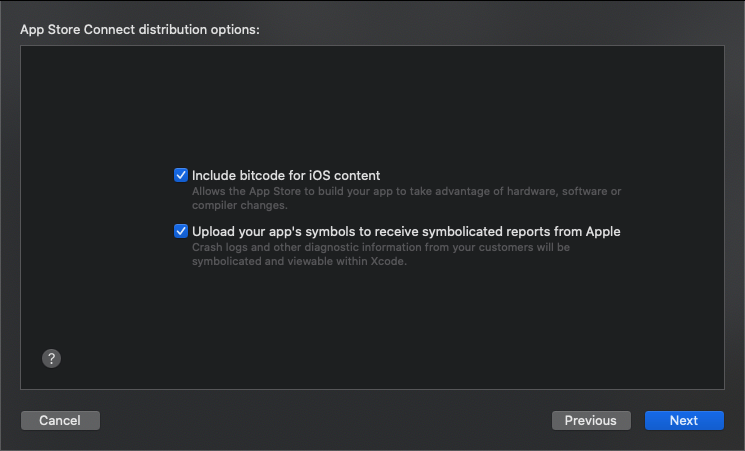
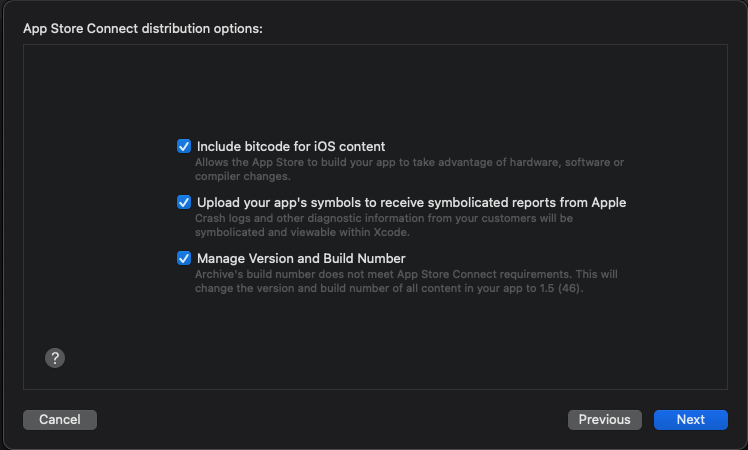
- Make sure both checkboxes are checked in App Store distribution options:
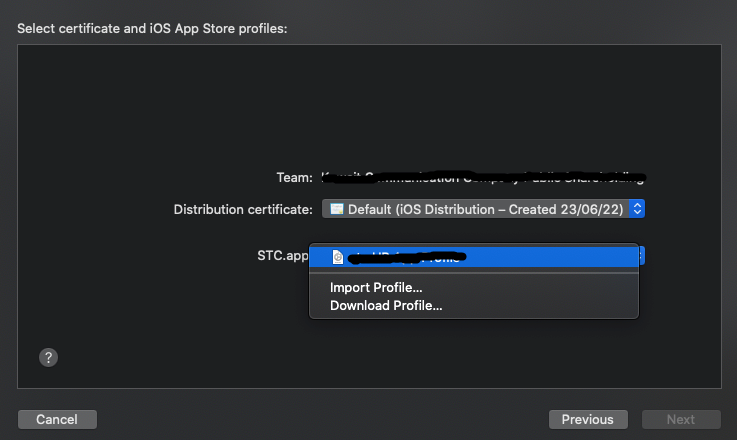
- In Select certificate and IOS app store profiles:
- Select Your project Profile in app:
- Again, enter your password for login keychain password and click allow
- Click Export. Enter your folder name and where you want to export and then click on Export.
- Your Folder will include the below mentioned files. You’ll require all the files for deployment.
- Select an Upload option
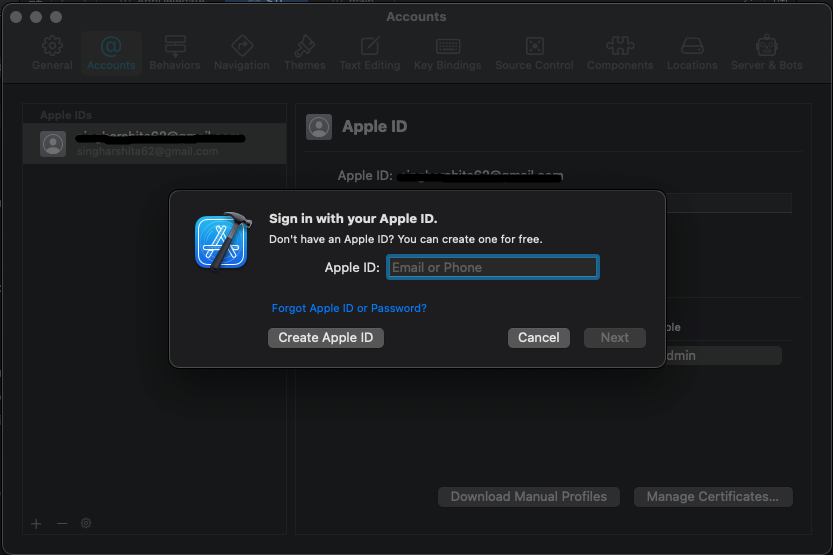
- Add Your Apple Id, in case you haven’t
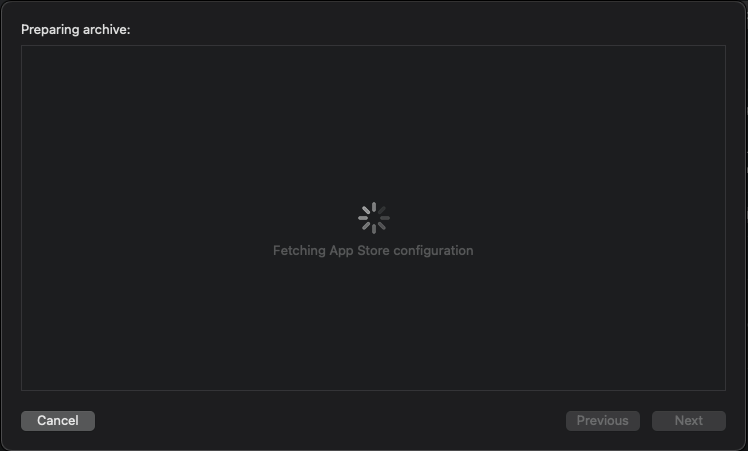
- Wait until Xcode is preparing Archive
- Make sure all the checkboxes are checked in App store connect distribution options
- Select the certificate and Ios app store profiles and click on next
- Enter your password for login keychain password and click allow
- It will start uploading your build to the App store connect Id. Once it starts finishing go to your App store and connect
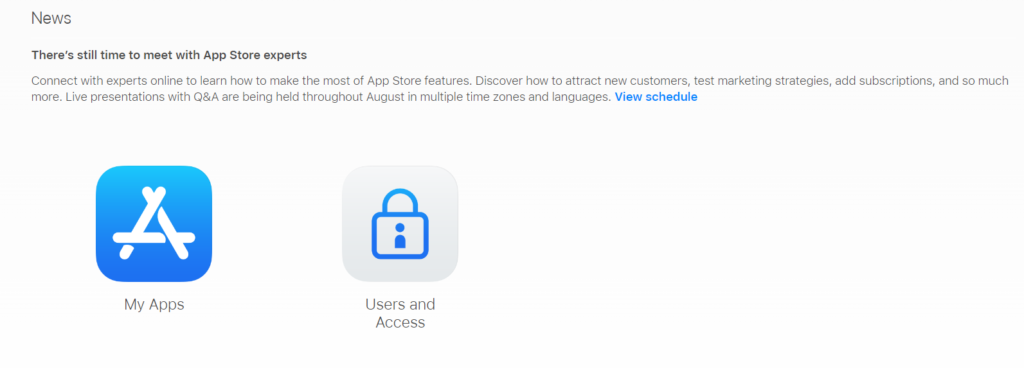
- Open App store Connect and log in with your id. After login click on My Apps
- Select your app
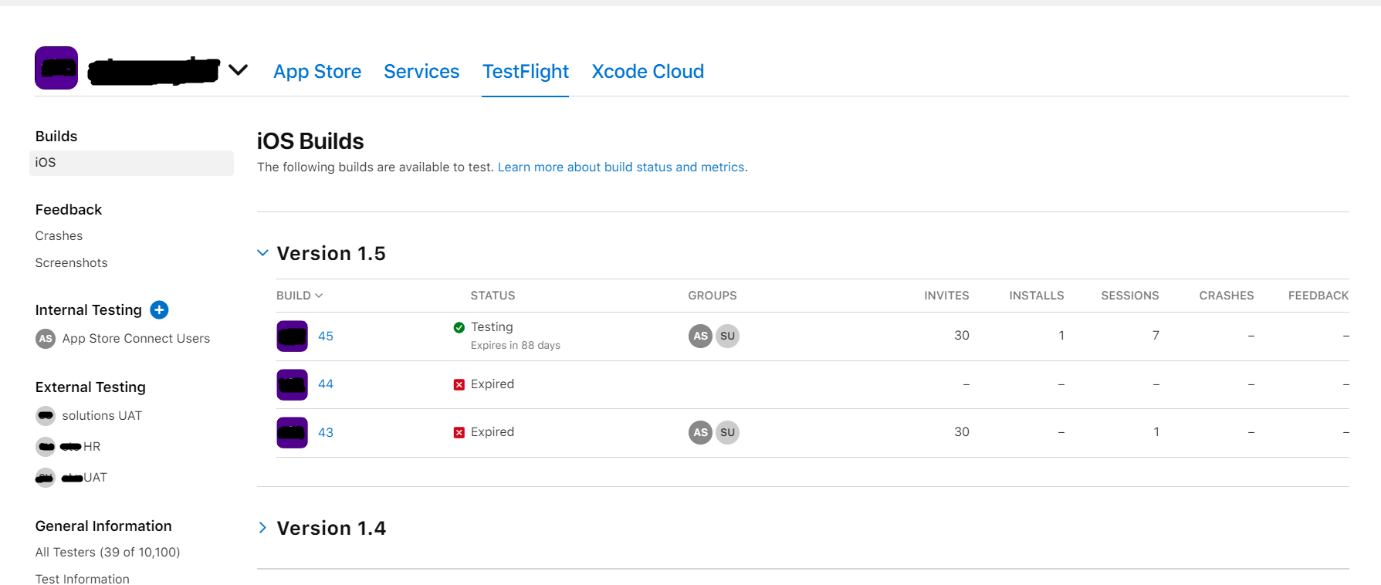
- Click on TestFlight, this is where you can see your latest build once it has finally been uploaded. Now your app is ready for testing.
- ERROR ITMS-90062: “This bundle is invalid. The value for key CFBundleShortVersionString [0.0.2] in the Info.plist file must contain a higher version than that of the previously approved version [3.11]. Please find more information about CFBundleShortVersionString at https://developer.apple.com/documentation/bundleresources/information_property_list/cfbundleshortversionstring“
- ERROR ITMS-90186: “Invalid Pre-Release Train. The train version ‘3.0’ is closed for new build submissions”
- ERROR ITMS-90478: “Invalid Version. The build with the version “101” can’t be imported because a later version has been closed for new build submissions. Choose a different version number.”
- ERROR ITMS-90532:” Invalid Toolchain”
- The first three errors are related to the Project version and Build number. Check Your Project version and build number carefully, it should be the incremental value from your last deployed Ipa in App Store.
- Last error occurs if your project is built on an outdated version of Xcode. To remove this error, You Build .Ipa file in Xcode(13) sdk (15) which is the latest requirement for App Store.
- Xcode (13) sdk(15) are available in mac with Big Sur therefore make sure you are matching the requirement.
[/vc_column_text][vc_column_text]Written By
Devanjan Nanda ( System Analyst-Mobile app development team)[/vc_column_text][stm_post_comments][/vc_column][/vc_row][vc_row full_width=”stretch_row” el_class=”third_bg_color” css=”.vc_custom_1451889219674{margin-bottom: -60px !important;}”][vc_column][vc_cta h2=”Looking for a First-Class Business Plan Consultant?” h2_font_container=”font_size:20px|color:%23000000|line_height:24px” h2_use_theme_fonts=”yes” shape=”square” style=”flat” add_button=”right” btn_title=”get a quote” btn_style=”flat” btn_color=”theme_style_2″ btn_align=”right” btn_i_align=”right” btn_i_icon_fontawesome=”fa fa-chevron-right” use_custom_fonts_h2=”true” btn_button_block=”true” btn_add_icon=”true” el_class=”third_bg_color” css=”.vc_custom_1451762600590{margin-bottom: 0px !important;}”][/vc_cta][/vc_column][/vc_row]

